How to Choose the Best Waterproof Panels for Your Project?
Choosing the best waterproof panels is not just a matter of picking a color or comparing prices. The right choice depends on where the panels will be installed, how much moisture they will face, and what lies behind them. A shower wall has different demands from a laundry-room backsplash or a damp basement. Small details matter.
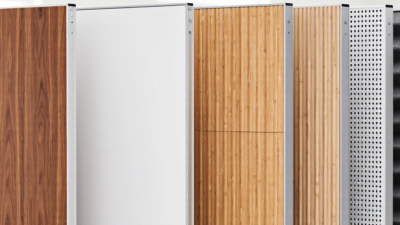
Waterproof panels come in several materials, including PVC, acrylic, and fiberglass-reinforced options. Each has trade-offs in weight, appearance, impact resistance, and installation. A smooth panel may be easier to wipe clean, while a textured finish can hide minor marks but collect grime in its grooves. Some panels resist surface water yet still rely on carefully sealed joints and suitable wall preparation. No panel can compensate for poor installation. That point is easy to overlook.
Before choosing, check the product’s technical data for approved uses, panel thickness, edge details, and cleaning instructions. Confirm that trims, adhesives, and sealants are compatible with the panel system. Measure the space carefully, including corners, plumbing openings, and the distance between studs where relevant. A low purchase price can become less attractive if the system needs special tools or costly finishing pieces.
There is no single best option for every project. A common planning mistake is to focus on the panel itself and ignore seams, ventilation, or maintenance. This guide will help you compare practical features, assess project conditions, and ask better questions before buying. A careful choice starts with the room, not the showroom sample.
Define Your Project’s Waterproofing Requirements
Define the conditions before comparing waterproof panels. Note whether the surface faces occasional splashes, daily shower spray, standing water, or moisture from behind. Different jobs. A kitchen backsplash may need wipe-clean protection, while a shower enclosure needs a coordinated system for seams, corners, and penetrations. Record the panel area, expected water exposure, and whether the space experiences temperature changes or freeze-thaw cycles.
Check what the panel can be installed over. Concrete, timber framing, and existing tile can require different preparation, fasteners, or backing. Look for technical data on water resistance, permitted uses, joint treatment, and installation limits.
A panel alone does not make a wall waterproof; gaps around valves, edges, and fixtures can still admit water. Small details matter. Compare the full installation method, not just the panel face.
I’ve seen project plans focus heavily on the material and leave too little room for careful sealing—that is an easy oversight to repeat. Confirm that the proposed assembly suits the site and applicable local requirements, and ask a qualified installer or supplier to clarify any unclear specifications.
Compare Waterproof Panel Materials and Construction
Waterproof panels are not interchangeable.
PVC panels are light, easy to cut, and useful where fast installation matters. Their smooth faces wipe clean, but thin sheets may flex if the framing is uneven. Fiberglass-reinforced panels resist impacts better and suit utility rooms, though their surface can look less refined.
Details matter.
Cement board is different.
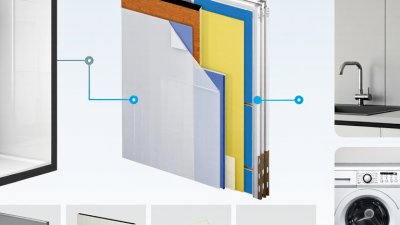
It tolerates moisture but is not waterproof by itself, so wet-area installations usually need a compatible membrane and carefully sealed joints. Some composite panels have waterproof cores and finished surfaces, reducing layers and installation time. Still, a panel’s core, thickness, and edge treatment matter as much as its face.
A sealed surface cannot compensate for a poorly fitted corner.
Look closely at how panels connect.
Tongue-and-groove edges can hide seams, while overlapping joints need consistent alignment to shed water. Check the manufacturer’s installation guidance, especially around shower fixtures, cuts, and penetrations.
A small gap near a pipe can invite trouble.
One easy mistake is choosing by appearance alone; substrate flatness and framing spacing can change how a panel performs. Measure the wall, inspect the backing, and compare the full assembly—not just the sample.
Evaluate Water Resistance and Performance Ratings
Water resistance is not a single number. Check what each rating actually measures: brief splashes, repeated wetting, or continuous exposure. These conditions are not interchangeable. A panel tested for occasional cleaning may not suit a shower enclosure or a damp utility room. Read the test method, exposure time, and any stated limits alongside the headline rating. If two products use different test standards, their scores may not be directly comparable. Details matter.
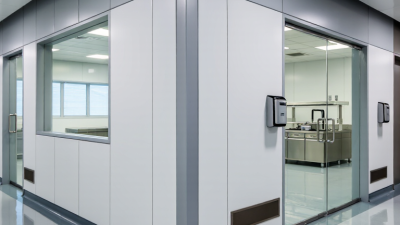
On real projects, weak points often appear at cut edges, joints, and fastener holes—not across the panel face. Look for performance information on seams and edge sealing, and confirm that the proposed installation matches the test conditions. A high rating cannot compensate for poor support or gaps around a sink. Not always. Ask for technical data, care instructions, and guidance on compatible sealants. A rating can look reassuring and still leave a gap: water exposure, cleaning products, and temperature changes may differ at your site. Test a sample near a cut edge if practical, and record how it is installed. That small check may reveal more than a glossy finish.
How to Read Water-Resistance Ratings
Lower water absorption generally indicates a denser ceramic tile. The chart shows the upper absorption limit for each ISO 13006 tile group; Group BIII has no upper limit shown here. These classifications apply to ceramic tiles, not waterproof panels. When choosing a panel, check its own technical data sheet and the applicable water-resistance test for your project.
Check Installation Needs and Surface Compatibility
A waterproof panel is only as reliable as the surface beneath it. Check whether the substrate is concrete, masonry, or framed board, then confirm the panel system permits that surface. Look for a dry, stable base without loose paint, dust, or soft spots. On a framed wall, check stud spacing and fastening requirements; even a small gap can make a panel flex under tile. Adhesives and sealants must also be approved for both the panel and finish material. “Waterproof” does not mean universally compatible.
Flatness matters. ANSI A108.02 sets a maximum substrate variation of 1/8 inch over 10 feet for tile with an edge of 15 inches or longer. That is a useful benchmark when panels will carry large-format tile. Measure with a straightedge, not just by eye. Check corners, seams, and penetrations too; these details often take longer than the broad wall. A panel can feel firm and still have a weak joint.
Moisture conditions matter before installation. The U.S. Environmental Protection Agency’s mold guidance notes that wet materials should generally be dried within 24 to 48 hours to help prevent mold growth. That makes leak checks and drying time more than housekeeping. Follow the panel system’s installation instructions for sealing joints and transitions, and verify that the finished assembly suits the room’s exposure. It is tempting to skip one compatibility check when the surface looks clean. That is where I would pause.
Balance Durability, Maintenance, and Project Costs
Choose panels for the actual wet zone, not just the product label. A shower wall, a laundry backsplash, and an outdoor enclosure face different moisture and cleaning demands. Check published test data, including water absorption and chemical resistance, and inspect how the system handles seams, corners, and penetrations. A cement-based panel may tolerate moisture, but it is not automatically waterproof; joints and the substrate may need a compatible membrane. Small leaks matter.
Compare installed cost with upkeep and replacement, not panel price alone. Include trims, sealants, labor, cleaning products, and access for repairs.
The U.S. Bureau of Labor Statistics reported a median annual wage of $46,050 for construction laborers in May 2024. That is not a contractor’s billed rate, but it shows why labor-intensive repairs can quickly erode initial savings. NIST’s Life-Cycle Costing Manual also advises evaluating acquisition, operation, maintenance, and replacement costs over time.
In a busy washroom, a smooth surface may clean quickly, while poorly sealed joints still demand attention. I would ask suppliers for test reports and maintenance instructions, then compare them against the project’s exposure. The cheapest option may work; the assumptions behind it deserve scrutiny.